The CT-10A fiber optic cleaver provides high quality cleaving at an economical price. Designed for cleaving single fiber only, this cleaver is best suited for the installation of field installable connectors and mechanical splices. The rugged yet scaled-down design offer cleave quality approaching that of more expensive high precision cleavers. The long-life, 16-position fat diamond blade is easily replaced by the end user and performs cleaving operation in one single step. An optional scrap collector can be purchased separately.
• Dedicated for single fiber cleaving
• User replaceable flat diamond blade
• Simple and single-step operation
• Blade life up to 64,000 cleaves
• Compact and light weight
• Detachable fiber scrap collector FC-03 available as option
Applicable Fiber: Conventional silica optical fiber
Fiber Count: Single fiber
Coating Diameter: 250µm to 900µm
Cladding Diameter: 125µm
Cleave Length:
6 to 20 mm (with AD-10 & coating = 250µm)
8 to 20mm (with AD-10 & coating > 250µm)
10mm (with FH-50/60 fiber holders)
Cleave Angle: Capability Typically 0.5˚
Dimensions: (W x D x H) 71mm x 88mm x 48mm (2.8" x 3.5" x 1.9")
Weight: 220g (0.48 lbs)
For more information on termination fiber optic cable and connectors you may contact Mercy Salinas at 888-797-3697 extension 232 or comment below!
"Author: Mercy Salinas"
Showing posts with label Tools. Show all posts
Showing posts with label Tools. Show all posts
Friday, May 4, 2012
Monday, January 9, 2012
Virtual Tour - SignalTek 33-974 Cable Tester from Ideal Industries
Features and Benefits of the SignalTek Cable Tester:
- Gigabit Performance Testing - Know the true performance of the Network
- Easy to read Pass/Fail performance reports that can be Stored and Printed for documentation
- Performs Gigabit Ethernet link establishment in 10 seconds
- Brilliant high-resolution color display visible in any lighting condition
- Maximum coverage with a full 2 year warranty
- Data Monitoring to detect intermittent network problems
- Easy to order from Discount-Low-Voltage.com
- More...

Related Posts:
Monday, November 28, 2011
Product Video - Magnepull Wire Fishing Tool
Features and Benefits of the Magnepull:
- Made in the USA
- Reduces cable fishing time by 70%
- Developed for commercial and residential applications
- Can be used horizontally and vertically allowing easy control of your wires to the outlet
- Pulls easily and effectively through insulated or non-insulated walls and under carpet
- Allows for installation in confined spaces
- In stock now!
- Easy to order from Discount-Low-Voltage.com
- More...
Related Posts:
Wednesday, August 3, 2011
Fiber Optic Visual Fault Finder - AFL HiLite Product Video

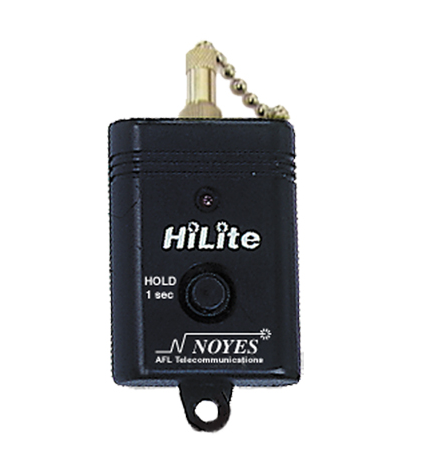
The AFL HiLite fiber optic visual fault finder is the star of this weeks Product Video Blog.
First, some information on visual fault finders:
Fault finders are designed to troubleshoot faults on fiber optic cables by sending a red laser beam through the fiber optic cable. Light generated by these units will escape from sharp bends and breaks in jacketed or bare fibers, as well as poorly mated connectors. They can identify faults in fiber optic jumper cables, distribution frames, patch panels, and splice trays. In addition, they can also be used to aid installation of AFL FAST fiber optic connectors.
Watch the Video!
Features and Benefits of the AFL HiLite:
- Compact, lightweight size
- Visible red laser source, 650 nm
- Easily locate faults in fiber optic cable, fiber jumpers, and more
- Includes 2.5mm adapter for popular SC and ST fiber optic connectors
- High power, 1 mW
- Universal connector interface for quick connection
- Easy to order from Discount-Low-Voltage.com
Related Posts:
Video: How It's Made - Fiber Optic Cable
Video: How To Terminate Fiber Optic Cable Using AFL FAST Connectors
Tutorial: Difference Between Loose Tube Fiber Optic Cable and Tight Buffered Fiber Cable
Whitepaper: Fiber Optic 10 Gigabit Ethernet Technology Overview
FAQ: Glossary of Common Fiber Optic Terms (A-E)
Thursday, April 15, 2010
Greenlee GL-UT2 Ultra Tugger 2 Cable Puller Video
Let's take a look at what the Ultra Tugger Cable Puller from Greenlee has to offer. Enjoy
GL-UT2 Ultra Tugger Cable Puller
For more details, contact us at (888) 797-3697 or visit Discount-Low-Voltage.com/InfoWednesday, December 2, 2009
How To Terminate Cat5e/Cat6 Kwik Jacks Using the Kwik Tool
The Kwik Jacks and Kwik Tool are the newest addition of keystone jacks to the Discount-Low-Voltage.com lineup. We first introduced them back in January of this year and have had nothing but great feedback for the Kwik Jacks. Today, Im going to show you step-by-step How To Terminate the Cat5e/Cat6 Kwik Jacks. I'll include photos and a video to help you along the way. Let's get started.
Blog Updated 6-15-11: New Kwik Tool design
What You Need:


Make sure the jacket on your cable is as close to the keystone jack as possible. You don't want anymore than 1/2" of the wires exposed. Below is a picture of the WRONG WAY to do it.


Now let's watch Mercy demonstrate this process on video:
Blog Updated 6-15-11: New Kwik Tool design
What You Need:


Electricans Scissors


Now that we have the right tools, lets punch down some keystone jacks
First, strip back the jacket about 1-2". The Cat6 cable (bottom) is larger than the Cat5e cable because it has a center spline, which separates all 4 pairs of wires. This center spline helps reduce Alien Cross-talk.

Cut off the ripcord


Cut off the separator if you're using Cat6 cable


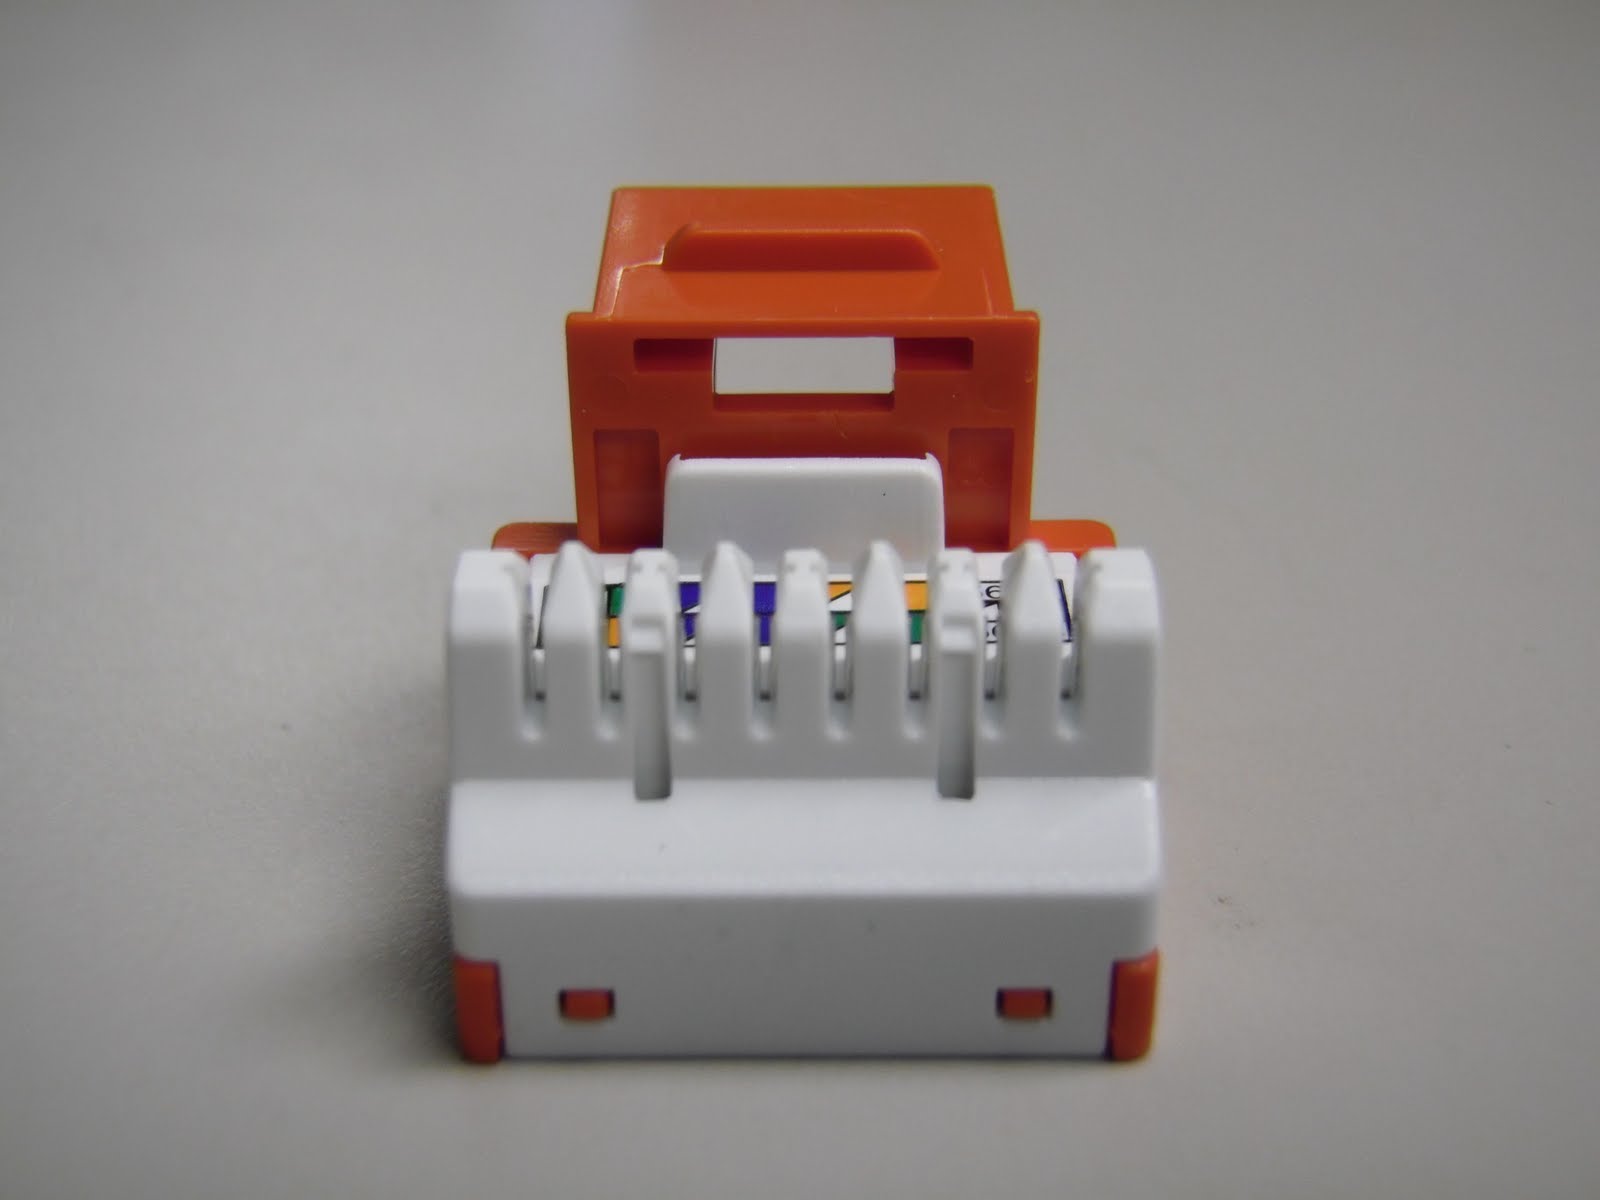
Now were ready to lace up the wires on your keystone jack. One the the nicest features of these jacks is the pointed 110s. This makes it much easier to lay the wires in, compared to the flat style some other keystone jacks have. Here's a close up view. You can also see it clearly shows the 568B and 568A color code on every jack.

Follow the color code on the side of the jacks. We suggest using 568B since it is the most common. Here is a picture of the 568B color code.


You can use your fingernail to seat the wires, or a utility knife. Make sure not to use the sharp side though, or you could cut through the wire jacket. Once all 4 pairs are laid down in the jack, it should look like this.

Make sure the jacket on your cable is as close to the keystone jack as possible. You don't want anymore than 1/2" of the wires exposed. Below is a picture of the WRONG WAY to do it.

Once the 4 pairs of wires are laced onto your Kwik Jack, slide the jack into the Kwik Tool
Updated 6-15-11: New Kwik Tool design
Here is what the Kwik Jack looks like inserted into the Kwik Tool
Once you have the Kwik Jack in the tool, simply squeeze down on the handle and release. This will punch down and cut all 4 pairs of wires. Remove the Kwik Jack from the tool. Here is a completed Cat5e/Cat6 Kwik Jack
Tip: You can also use a 110 punch tool to terminate the Kwik Jacks
Tip: You can also use a 110 punch tool to terminate the Kwik Jacks

Now, snap on the included dust cover and you're done.

Now let's watch Mercy demonstrate this process on video:
We hope our article on How To Terminate Cat5e/Cat6 Kwik Jacks Using the Kwik Tool was helpful. For more information, or to order any of these items, visit our website at Discount-Low-Voltage.com
Related Posts:
How To Punch Down Cat5e/Cat6 Keystone Jacks (using a 110 punch tool)
Wednesday, November 25, 2009
How To Punch Down Cat5e/Cat6 Keystone Jacks
How to punch down a Cat5e/Cat6 keystone jack, step-by-step instructions. I took a bunch of pictures along the way to better explain the process, and to let you see just what it should look like. If you want to see the process of punching down a Cat5e or Cat6 jack on video, scroll to the bottom of this post. To get started, let's take a look at what tools you will need:
Electricians Scissors (regular household scissors will work also)

Wire Stripper (you can use electricians scissors if you don't have any wire strippers)

Punch Down Tool with 110 Blade

Punch Down Palm Tool (optional)


Now that we have all the tools, let's punch down some keystone jacks.
First, strip off at least 1 inch of jacket on your Cat5e/Cat6 cable. Make sure not to cut into the wires. If you do, you'll need to start over. This picture shows what the two cables look like side by side. The Cat6 cable is larger (bottom) due to the separator between the pairs.

Cut off the ripcord

If you using Cat6 cable, it should have a separator. Cut that off as well. Simply pull the 4 pairs of wire back and cut it off

Now were ready to lace up the wires on the keystone jack. This style of jack is very user friendly and great for beginners or professional installers. You can see 110s are in a single row and that they are pointed, making it easier to lace the wires down
Let's go ahead and wire these keystone jacks following the 568b Wiring Diagram

You can see the keystone jack has the color code for 568A and 568B on the jack. They are very similar, but 568B is most commonly used nowadays.

Once all the wires are laid down, your keystone jack should look like this. Notice how I left the pairs of wire twisted. I was able to do this because of the pointed ridges on the jack, making it much easier to set the wires in. Many other styles of jacks out there have a flat surface, requiring you to untwist all 4 pairs of wire down to the jacket. Also notice how the jacket of the cable is right up against the keystone jack. You don't want any more than 1/2" of the wires exposed.

Once you have the wires laced in correctly, set your keystone jack in a jack palm tool. If you don't have one of these available, you can punch the jack down on the ground or a desk, but I suggest putting a piece of cardboard down to prevent the jack from slipping out when you punch them down. I would strongly suggest AGAINST using your hand to punch down jacks without the use of this tool. The jack can slip out and the tool will cut right through your hand. Not a pretty site

Now, take your punch tool and find the side that says "CUT". You want to make sure the tool faces the correct way, or you'll cut the wrong side of the wires off. This is how your tool should look when punching down the jack. Notice the pointy tip on the left side of the 110s

A close up view of the 110 blade shows this better

Once the punch down tool is positioned correctly, push down firmly until you feel it pop. You should see the wire cut off. If it doesn't, you may need to do it once more. Here you can see I terminated the brown pair

Repeat with the other 3 pairs of wires and you have a completed keystone jack. It will look like this. Note how the jacket is very close to the jack. You want to make sure you keep it as close as possible.


Now let's watch it on video

Once you have the wires laced in correctly, set your keystone jack in a jack palm tool. If you don't have one of these available, you can punch the jack down on the ground or a desk, but I suggest putting a piece of cardboard down to prevent the jack from slipping out when you punch them down. I would strongly suggest AGAINST using your hand to punch down jacks without the use of this tool. The jack can slip out and the tool will cut right through your hand. Not a pretty site

Now, take your punch tool and find the side that says "CUT". You want to make sure the tool faces the correct way, or you'll cut the wrong side of the wires off. This is how your tool should look when punching down the jack. Notice the pointy tip on the left side of the 110s

A close up view of the 110 blade shows this better


Repeat with the other 3 pairs of wires and you have a completed keystone jack. It will look like this. Note how the jacket is very close to the jack. You want to make sure you keep it as close as possible.

Here is a picture or the WRONG way. The cable jacket is stripped too far back, exposing more than 1/2" of the wires

Lastly, press the clear dust cover on your jack and your DONE

Now let's watch it on video
New Tool Available!
Want to terminate Cat5e/Cat6 jacks quicker? Try the Kwik Tool and Kwik Jacks, available at Discount-Low-Voltage.com. Read the instructions for Terminating Cat5e/Cat6 Kwik Jacks here. The Kwik Tool removed the need for buying the punch down tool, 110 blade and palm tool. Safer, faster and less expensive. Call us for details on how to get a free Kwik Tool today! (888) 797-3697
Want to terminate Cat5e/Cat6 jacks quicker? Try the Kwik Tool and Kwik Jacks, available at Discount-Low-Voltage.com. Read the instructions for Terminating Cat5e/Cat6 Kwik Jacks here. The Kwik Tool removed the need for buying the punch down tool, 110 blade and palm tool. Safer, faster and less expensive. Call us for details on how to get a free Kwik Tool today! (888) 797-3697
We hope you enjoyed this article on how to punch down Cat5e/Cat6 keystone jacks. Feel free to leave comments or suggestions in the comment box below and thanks for visiting.
Related Posts:
Still have questions? You can reach us at (888) 797-3697
Visit our website at Discount-Low-Voltage.com to order any of the items seen in this article.
Wednesday, October 14, 2009
How to Make an Ethernet Cat5e/Cat6 Cable
Welcome to the Discount-Low-Voltage.com Blog. Today we are going to demonstrate How to Make an Ethernet Cat5e or Cat6 Cable. Here is a list of the items you will need to make your ethernet cable:
 Wire Stripper
 Cable Cutter
 RJ45 Crimp Tool
 RJ45 Modular Plugs
 Ethernet Cable - Cat5, Cat5e or Cat6
 Cable Tester
Now that you have the right tools, lets make an ethernet cable.
Step 1) Strip off 2 inches of jacket on the cable. Cut the excess ripcord off. (Note: If you're using Cat6 cable, it may have a wire separator between the 4 pairs of wires. Cut that off as well).

Step 2) Untwist all 4 pairs of wire.

Step 3) Follow the standard 568b Wiring Diagram:
 Orange/White
Orange
Green/White
Blue
Blue/White
Green
Brown/White
Brown
Step 4) Hold the wires flat and use scissors to cut straight across, leaving 1/2" of wire exposed.

Step 4a) If you're making Cat6 cables, your mod plug will come with a loadbar. This small plastic piece must go on before you insert the wires into the mod plug. (for detailed instructions on installing the loadbar, scroll down to the comments located at the very bottom of this article)

Step 5) Insert the wires into your modular plug, making sure to keep the wires flat and in the same order. Verify that the wires are all flush at the very end of the plug. Note how the cable jacket is past the crimp spot on the plug and the wires are all the way to the end.

Step 6) Insert mod plug into crimp tool and squeeze handle. Keep slight pressure on the cable (towards the crimp tool) as you're crimping the plug. This will ensure nothing comes loose as you squeeze the handle and crimp down the mod plug.

Step 7) Remove mod plug from crimp tool and verify everything was done correctly. Note how the crimp is pushing down on the jacket and the pins have seated into the wire. Now follow the same process on the other side.

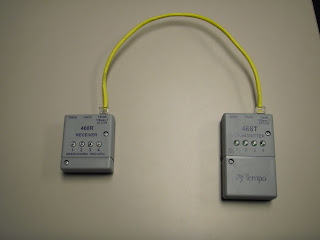
Step 8) Now that you have a completed ethernet cable, plug one end into your Transmitter and the other end into the Receiver. The wires will light up either "Green" or "Red". If you have done everything correctly, you should see all green lights. If not, you will need to go back and redo the side causing the error.
Don't own a crimp tool? Need more Cat5e cable? Order that all here:
Wire Stripper
Cable Cutter (Electricians Scissors)
Ratcheting Crimp Tool
RJ45 Mod Plugs 8P8C
Bulk Cat5e Ethernet Cable
Cable Tester
Like watching it done on video? Mercy will demonstrate the process of making an ethernet cable for you. Enjoy
We hope you like our demonstration of How to Make an Ethernet Cat5e Cable. Want to see more instructional videos, like How to Punch Down a Patch Panel or How to Terminate Fiber Optic Cable? Visit the Discount-Low-Voltage.com YouTube page.
Note: Maximum cable length for Cat5e cable is 100 meters. Anything longer than that might not work correctly.
Related Posts:
How To Terminate Cat5e/Cat6 Kwik Jacks Using the Kwik Tool
How To Punch Down Cat5e/Cat6 Keystone Jacks
How Low Voltage Cable is Made
Crazy Data Center Wiring Pictures and Video
Standard 568b Wiring Diagram
4 Pair Cat5e CMR Bulk Cable
How To Fish Wires Through a Wall or Ceiling


Now that you have the right tools, lets make an ethernet cable.
Step 1) Strip off 2 inches of jacket on the cable. Cut the excess ripcord off. (Note: If you're using Cat6 cable, it may have a wire separator between the 4 pairs of wires. Cut that off as well).

Step 2) Untwist all 4 pairs of wire.

Step 3) Follow the standard 568b Wiring Diagram:

Orange
Green/White
Blue
Blue/White
Green
Brown/White
Brown
Step 4) Hold the wires flat and use scissors to cut straight across, leaving 1/2" of wire exposed.


Step 5) Insert the wires into your modular plug, making sure to keep the wires flat and in the same order. Verify that the wires are all flush at the very end of the plug. Note how the cable jacket is past the crimp spot on the plug and the wires are all the way to the end.

Step 6) Insert mod plug into crimp tool and squeeze handle. Keep slight pressure on the cable (towards the crimp tool) as you're crimping the plug. This will ensure nothing comes loose as you squeeze the handle and crimp down the mod plug.

Step 7) Remove mod plug from crimp tool and verify everything was done correctly. Note how the crimp is pushing down on the jacket and the pins have seated into the wire. Now follow the same process on the other side.

Step 8) Now that you have a completed ethernet cable, plug one end into your Transmitter and the other end into the Receiver. The wires will light up either "Green" or "Red". If you have done everything correctly, you should see all green lights. If not, you will need to go back and redo the side causing the error.

Don't own a crimp tool? Need more Cat5e cable? Order that all here:
Wire Stripper
Cable Cutter (Electricians Scissors)
Ratcheting Crimp Tool
RJ45 Mod Plugs 8P8C
Bulk Cat5e Ethernet Cable
Cable Tester
Like watching it done on video? Mercy will demonstrate the process of making an ethernet cable for you. Enjoy
We hope you like our demonstration of How to Make an Ethernet Cat5e Cable. Want to see more instructional videos, like How to Punch Down a Patch Panel or How to Terminate Fiber Optic Cable? Visit the Discount-Low-Voltage.com YouTube page.
Note: Maximum cable length for Cat5e cable is 100 meters. Anything longer than that might not work correctly.
Related Posts:
How To Terminate Cat5e/Cat6 Kwik Jacks Using the Kwik Tool
How To Punch Down Cat5e/Cat6 Keystone Jacks
How Low Voltage Cable is Made
Crazy Data Center Wiring Pictures and Video
Standard 568b Wiring Diagram
4 Pair Cat5e CMR Bulk Cable
How To Fish Wires Through a Wall or Ceiling
Subscribe to:
Posts (Atom)