You'll need Wire Strippers, Pliers, Cable Cutter, Cat6a Shielded Keystone Jacks, and Cat6a Shielded Bulk Cable
Let's get started:
Step 1: Strip back about 2" of the cables jacket
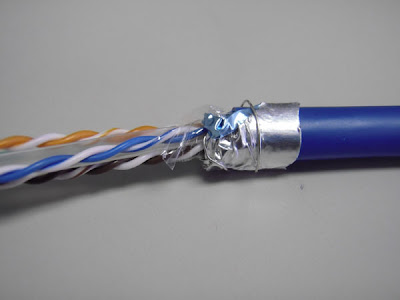
Step 2: Cut off the outer plastic
Step 3: Pull back the foil and drain wire
Step 4: Cut off the inner plastic
Step 5: Cut the foil, leaving about 1/4" and wrap it around the cable. (Note: it will not completely wrap around the cable, this is normal). Then wrap the drain wire completely around the foil
Step 6: Pull back all 4 pairs of wires and cut off the center spline
Step 7: Run the wires up through the cap and lay the wires in the appropriate slots according to the 568B wiring diagram
Step 8: Trim the wires flush with the cap
Step 9: Insert the cap into the Cat6A keystone jack. Notice that the jack and the cap have arrows on them. Make sure they are both pointing the same direction.
Step 10: Close the jaw all the way until it clicks
Step 10a: If your having trouble closing the jaw, open it back up and push down on both sides of the cap. This will seat the wires. I just used a regular pair of scissors.
Step 10b: Now do the other side
Step 11: Push the shielding lug up against the cable
Step 11a: I got a much tighter seal by using pliers
Step 12: Install the included zip-tie to make sure nothing comes loose and your done. This is a completed Cat6A shielded keystone jack.
In the event that your Cat6A keystone jack isn't working properly, you will need to cut off the zip-tie, pull back the shielding lug and insert a small flat head screwdriver into the slot, twist and it will pop open. We hope this article covered everything you need to know about terminating Cat6A keystone jacks.
Still have questions about how to terminate cat6a keystone jacks? Give us a call at (888) 797-3697. Visit our website at Discount-Low-Voltage.com to order any of the items seen in this article.
Related Posts:


No doubt I need to charge more per jack installation with that kind of labor going on.
ReplyDelete