Showing posts with label Bulk Cable. Show all posts

Wednesday, December 7, 2011

Bulk Cat5e 25 Pair Indoor/Outdoor Cable Video


Features and Benefits of the Superior Essex Cat5e 25 Pair Cable:
- Made in the USA
- Allows installation at -20°C temperatures
- Small outside diameter
- Capable of 1000BASE-T
- Black, CM rated, non-haolgen, OSP grade jacket material
- Vibrant insulation colors
- Compliant to ANSI/TIA-568-C.2 for CAT 5e
- Easy to order from Discount-Low-Voltage.com


Related Posts:

Tuesday, September 6, 2011

500ft Bulk Cat5e Cable - Bravo Paks


The 500ft Bulk Cat5e Bravo Pak is the star of this weeks Product Video Blog.

This 500ft bulk cat5e cable works great with:
- The Kwik Jack System
- Dynacom Cat5e 110 Patch Panels
- RJ45 Modular Plugs


Watch the Video!


Features and Benefits of the 500ft Bulk Cat5e Bravo Pak Cable:
- Short 500ft length for small jobs
- Less Waste
- Easy to pull, never kinks
- UL Listed and RoHS Compliant
- Great for making custom length ethernet patch cords
- In stock now!
- Easy to order from Discount-Low-Voltage.com


Related Posts:

Monday, August 1, 2011

Industrial Cat5e Bulk Cable Solution for Mobile MRI Machines

Rick Dressel from Alliance HealthCare Services came to us looking for a solution to connect his mobile MRI machine to the clients Hospital. Alliance Imaging provides mobile MRI, PET/CT and CT, in addition to state-of-the-art dedicated breast MRI systems.


Rick had problems with previous cabling he was using. He started with a traditional solid conductor Cat5e PVC indoor cable. Unfortunately, over time he had to constantly replace these cables due to the repeated exposure to UV rays and harsh weather elements. In addition, the cable jacket was being torn up from repeated contact with the ground.


His next cable selection was a Cat5e solid direct burial cable. Although this cable is meant to stand up to the elements, it is gel filled, making working with this cable a hassle. The drag on different surfaces also eventually ate through the jacket.

We made the recommendation of using Datamax Extreme Cat5e Cable. This Quabbin 5730R cat5e cable has a polyurethane jacket, aluminum shield, and drain wire for superior harsh environment conditions. This cable uses a stranded conductor design, providing the flexibility Rick needed. Having sold this cable to production studios, we knew the DataMax Extreme cat5e cable would withstand the constant abuse. After having this cable installed on Rick's mobile MRI, here's what he had to say:

"Mr. Mercy Salinas, thank you for your expert knowledge in finding the perfect cat-5 cable, for our application. The Quabbin 5730R is exceeding far beyond expectations. I believe this cable will last in a outdoor environment for years. Any company using cat-5 in a outdoors environment, should try this cable. Thank you again for all of your help." - Rick Dressel


Related Posts:

Video: Bulk Cat5e Cable and Bulk Cat5e Shielded Cable
Video: How It's Made - Low Voltage Cable (Cat3, Cat5e, Cat6, OSP)
Video/Pictures: How to Terminate Cat5e and Cat6 Kwik Jacks
Update: UL Requires New Holographic Labels for Bulk Cable
Video/Pictures: How to Make Ethernet Cat5e Cables

Wednesday, February 16, 2011

UL Requires New Holographic Labels for Communications Cable


To further enhance the integrity of the UL Mark, UL is introducing a holographic label requirement for a wide variety of cable categories. The new UL Marks include the use of secure golden holographic label material and color shifting inks to prevent unauthorized label reproduction.

This type of label has been proven an effective tool in deterring counterfeit products from entering the marketplace. Effective October 1, 2010 manufacturers will be required to apply holographic UL Marks for the products noted below. Although the holographic label is new, the remaining engineering marking information provided on the cable tags or reels and the methods for applying these markings remain unchanged.

• Communications Cable (DUZX/DUZX7)
• Communications Cable Verified to UL Performance Category Program (DUZX)
• Data Transmission Cable Verified in Accordance With National or International Specifications (DVBI)
• Community Antenna Television Cable (DVCS)
• Data Processing Cable (EMRB)
• Non-Power-Limited Fire-Alarm Cable (HNHT)
• Power-Limited Fire-Alarm Cable (HNIR / HNIR7)
• Instrumentation Tray Cable (NYTT)
• Network Powered Broadband Communications Cable (PWIP)
• Optical Fiber Cable (QAYK/QAYK7)
• Power Limited Circuit Cable (QPTZ)

Code authorities have already begun to see cables with the new holographic labels during their inspections, and will see an increasing number of cables with these markings in the future. You can expect to see the UL symbol on the product and the new holographic UL Listing Mark on the attached tag, the reel, or the smallest unit container in which the cable is packaged. The UL symbol will still appear on the surface print of the cable, and can be either the complete UL in a circle, or the letters “UL” in parenthesis “(UL)”. Surface printing of the UL Certification Mark on the wire insulation or jacketed material is only permissible when the accompanying reel or smallest unit container is also provided with the UL holographic Listing Mark. Although manufacturers cannot add non-holographic labels to cable after October 1, 2010, it may take a while for cable with the non-holographic Listing Marks to be cleared from the supply chain.


An example of the UL holographic label on Cat5e Bulk Communications Cable offered at Discount-Low-Voltage.com


Related Posts:
UL Warns About Counterfeit Communications Cable
UL Finds Performance & Safety Issues Found in Offshore Communications Cable
How Low Voltage Communications Cable is Made - Cat3, Cat5e, Cat6, OSP
25 Pair Cat3 Telephone Communications Cable Video
What is Plenum Communications Cable and When Should I use It
How To Make an Ethernet Cat5e/Cat6 Cable

Thursday, February 10, 2011

Interlock Armored Fiber Optic Cable or Non-Armored Fiber With Innerduct?

Fiber Optic Cable Installation:
Fiber optic cable is a great investment to any infrastructure, providing superior performance at much longer distances than traditional copper networks. When installing fiber optic cable, there's many factors to take into consideration. One of the most important, is how to protect your investment. Two of the most common routes to take are installing an innerduct, or buying fiber that has a layer of protection built in. Both have their pro's and con's, so lets take a look at each.


Fiber Optic Cable Installed in Innerduct:
Innerduct is a corrugated tube that surrounds your fiber optic cable giving it protection and acts as a pathway for the fiber to be pulled through. Innerduct comes in HDPE for outdoor use, PVC for indoor use and PLENUM for indoor use in plenum air spaces. Although innerduct is a great way to protect your fiber, it requires an extra step. This can result in higher labor costs, materials costs and possible additional equipment and freight fees. Long lengths of innerduct require very large wooden spools to be put on, which can be costly to ship and work with. Once the innerduct is installed, you proceed as usual: run your fiber optic cable, terminate and test it. Wouldn't it be easier if you could just run fiber and remove the innerduct step altogether? You can... keep reading.


Interlock Armored Fiber Optic Cable:
Interlock armored fiber cable is a great alternative to installing innerduct. Interlocking Armored Riser Cables are standard cables placed inside a spirally-wrapped aluminum interlocking armor for ruggedness and superior crush resistance. Designed for use in riser and general purpose environments for intrabuilding backbone and horizontal installations, these multifiber cables use individually jacketed TBII® Buffered Fibers enabling easy, consistent stripping and facilitating termination. This core is protected by a flexible, spiral-wrapped, aluminum interlocking armor that offers over seven times the crush protection compared to unarmored cables and easy one-step installation. With a flame-retardant outer jacket, this cable is particularly useful for heavy traffic or more challenging mechanical exposure conditions and applications requiring extra rugged cables. Interlocking armored fiber does have it's downfalls though. Future additions: when installing innerduct, you can reuse the cabling pathway to replace the fiber, or add additional fibers if you have extra space. This is a great way to maximize your investment. Without that innerduct installed, you will be starting the process all over again from the beginning. Pricing is also a concern. Interlock armored fiber is typically 3 times as expensive as regular non-armored fiber.

Here's a quick look at one of these cables from our YouTube Channel.


Tips:
- Always install the correct fiber and innerduct based on your buildings fire safety codes
- Future proof your installation if possible. Install a larger innerduct than needed or buy an interlocking armored fiber with additional strands of fiber.
- Pre Terminated Fiber Cable: Can cut fiber installation by 75%. This is a great option for beginners or long time fiber installers. Pre terminated fiber is custom made to your exact specs, comes with a pulling eye for easy installation and includes test results.

Related Articles:
Pulling Fiber Optic Cable
How It's Made: Fiber Optic Cable
How To Install Fiber Optic Fan Out Kit for Loose Tube Fiber
Difference Between: Loose Tube Fiber and Tight Buffered Fiber
How To Terminate Fiber Optic Cable Using AFL FAST Connectors    

"By Mercy Salinas"

Monday, June 7, 2010

What is Plenum Cable/Innerduct and When Do I Use it?

What is Plenum?

According to the National Electric Code (NEC) a plenum is a "compartment or chamber to which one or more air ducts are connected and [which] forms part of the air distribution system." To qualify as a plenum, the space above an acoustic tile ceiling would have to extend above other rooms in the same building or be open to ducts connecting it to other parts of the building. The concern is that during a fire, if there is burning material in a plenum air space, smoke and fumes can travel through air ducts to the whole building. For this reason, there are codes to restrict the types of materials (such as wiring) that can be placed in the plenum.

It's quite common to have an acoustic tile ceiling without having a plenum. If your room-dividing walls extend above the dropped ceiling and seal off the space above, you do not have a plenum air space and so may not require plenum-rated wires. You can lift up an acoustical tile in your room and peek in to see if your room has a plenum.

What is the code?

According to the National Electric Code (NEC), in plenum air spaces you must use plenum rated cables, also called Communications Plenum Cable (CMP). Plenum cable is only required when cable is installed in a plenum air space. Materials kept below the ceiling — including speaker wire, computer cables, telephone cords, etc. — do not need to be plenum rated according to the NEC.

Remember that even though the National Electric Code may allow non- plenum cable, the final decision is up to your local Fire Marshall. Most cities adopt the national codes as their own without revision, but some cities modify or expand them and require plenum-rated cable in all situations. Regardless of the code or its interpretation, your Fire Marshall makes the final decision. We recommend that you contact your Fire Marshall if you have questions.
http://www.firemarshals.org/links/state-fire-marshals-websites/

Why is the regulation for plenum air spaces but not for inside the classroom?

It's dangerous to inhale fumes from any burning material. Communications cable is no more dangerous than any other plastic item you would find below the ceiling in a typical classroom — computers, carpet, power cords, etc. Therefore, requiring the use of plenum wires within the classroom itself would have little impact. The regulation covers the area where it's most critical.

How is plenum cable and innerduct different from CRM/PVC?

The Plenum rated coating on wire burns at a much higher temperature and emits fewer fumes.

What does plenum wire look like?

Identifying this cable just by looking at it is hard to tell. It is very similar in look and feel, so you'll want to check the print on the jacket for the letters "CMP"

Who sets the guidelines?

The National Electrical Code (NEC) is a set of guidelines recommending procedures to reduce the risk of fires, electric shock and other hazards associated with electrical installations. The code is advisory in nature, but most state and local building departments across the country use the NEC as the basis for their own electrical codes. Some local codes may be more restrictive, so please check with your local Fire Marshall if you're unsure.

Is compliance with the locally-adopted code mandatory?

Yes. City, county or state codes are mandatory and enforceable as law.

Make sure you and your contractor are on the same page. When life has been lost in a fire a lawsuit is not out of the question if plenum wire has not been installed when it should have been.

Thursday, April 8, 2010

New Videos - Bulk Cat5e Cable at Discount-Low-Voltage.com

Check out the new product videos we did on Bulk Cat5e cable and Cat5e Shielded Cable. The cat5e cable comes in 1,000ft pull boxes and features the Reelex cone inside. These Reelex boxes reduce tangles while pulling cable, which increases your productivity. The shielded cat5e cable comes on a durable wooden spool. For more information on both products, click the links above or visit Discount-Low-Voltage.com.


Bulk Cat5e Cable Video


Bulk Cat5e Shielded Cable


Related Posts:
Bulk Cat5e Cable Details
How To Make an Ethernet Cat5e/Cat6 Patch Cable
Standard 568b Wiring Diagram
Crazy Cat5e Wiring - INSANE!!!
How It's Made - Cat5e Low Voltage Cable Video

Tuesday, March 30, 2010

Belden 1532A Direct Burial RG6 Coax Cable Video

As always, we've been busy making product videos for you. Today's video features a direct burial RG6 cable by Belden. This RG6 coax cable is used primarily for CATV installations, and is perfect if you have a satellite dish in your backyard, or anywhere not attached to the house. You can order this cable in 250ft, 500ft, 750ft or 1,000ft. To order, click the link above or visit Discount-Low-Voltage.com


Belden Part # 1532A

Thursday, March 25, 2010

100 Pair Cat3 Telephone Cable Video

 Here's our 100 pair category 3 telephone cable for indoor use. This cable is cut per foot, so you can order any length between 1 and 1,000 feet. We also have it available with a plenum rated jacket, for use in air handling spaces in accordance with Fire & Safety Code. Smaller pair counts are available online, as low as 4 pairs. If you need more than 100 pair cable, please contact us for a quote.


To order, click the link above or visit Discount-Low-Voltage.com

Related Posts:
How 100 Pair Low Voltage Cable is Made
25 Pair Cat3 Telephone Cable Video
25 Pair Color Code Chart
100 Pair PE22 Aerial Telephone Cable

Tuesday, March 23, 2010

100 Pair Aerial Telephone Cable Video


100 Pair Aerial/Duct Category 3 Telephone Cable for Outdoor Use

Let's take a look at what the 100 pair aerial telephone cable looks like. As you can see, this is a very thick and strong cable, with an outside diameter of 0.88". The 24AWG durable black jacket us UV and weather resistant. Underneath the jacket is a corrugated 0.008" aluminum tape and plastic coating for superior protection.


Features:
- USA Made
- General Cable part # 7527161
- 100 Pair
- 24 AWG (American Wire Gauge)
- PE22 Rated for Aerial/Duct
- UV Resistant Jacket
- Corrugated Aluminum Tape


Note: We recommend using a PE89 cable for direct burial use. The PE89 features a water blocking gel for supreme protection against the elements. 

To order, click the link above, or visit Discount-Low-Voltage.com

Thursday, March 11, 2010

12 Pair Direct Burial Telephone Cable Video

12 Pair direct burial telephone cable is suitable for outdoor applications without the use of conduit. The cable is filled with water resistant gel and a UV resistant jacket. The conductors are 24awg and follow the industry standard color code for twisted pair cables. Direct burial telephone cable must not be run for more than 50ft inside buildings (per the National Electrical Code). Let's take a look at what the 12 pair PE89 direct burial telephone cable looks like.


Specifications:
Core Construction:
- Solid, annealed copper; size 24 AWG

Insulation:
- Dual insulation consisting of an inner layer of foamed polyolefin surrounded by a solid polyolefin skin, color-coded in accordance with telephone industry standards

Twisted Pairs:
- Insulated conductors are twisted into pairs with varying lay lengths to minimize crosstalk

Core Assembly:
- 25 pairs and less: pairs are assembled together in a single group
- More than 25 pairs: pairs are arranged in groups, each group having a color coded unit binder

Filling Compound:
- The entire core assembly is completely filled with ETPR compound, filling the interstices between the pairs and under the core tape

Core Wrap:
- Non-hygroscopic dielectric tape applied longitudinally with an overlap

Aluminum Shield:
- Corrugated, copolymer-coated, 0.008" aluminum tape applied longitudinally with an overlap
- The sheath interfaces are flooded with an adhesive water-blocking compound

Jacket:
- Black, linear low density polyethylene Application(s):
- Intended for duct and direct buried installations where protection against water and moisture entry is required and may also be installed aerially

Compliance:
- Rural Development Utility Program(RDUP) 7 CFR 1755.890 (RUS PE-89)

For pricing, visit 12 Pair PE89 Underground Telephone Wire

Related Posts:
25 Pair Direct Burial Telephone Cable
Cat5e 4 Pair Direct Burial Wire
Video - How Low Voltage Direct Burial Cable is Made

Wednesday, February 10, 2010

25 Pair Color Code Chart

25 pair color code chart


25 pair color code list:


1 white/blue
2 blue/white
3 white/orange
4 orange/white
5 white/green
6 green/white
7 white/brown
8 brown/white
9 white/slate
10 slate/white
11 red/blue
12 blue/red
13 red/orange
14 orange/red
15 red/green
16 green/red
17 red/brown
18 brown/red
19 red/slate
20 slate/red
21 black/blue
22 blue/black
23 black/orange
24 orange/black
25 black/green
26 green/black
27 black/brown
28 brown/black
29 black/slate
30 slate/black
31 yellow/blue
32 blue/yellow
33 yellow/orange
34 orange/yellow
35 yellow/green
36 green/yellow
37 yellow/brown
38 brown/yellow
39 yellow/slate
40 slate/yellow
41 violet/blue
42 blue/violet
43 violet/orange
44 orange/violet
45 violet/green
46 green/violet
47 violet/brown
48 brown/violet
49 violet/slate
50 slate/violet

Wednesday, December 2, 2009

How To Terminate Cat5e/Cat6 Kwik Jacks Using the Kwik Tool

The Kwik Jacks and Kwik Tool are the newest addition of keystone jacks to the Discount-Low-Voltage.com lineup. We first introduced them back in January of this year and have had nothing but great feedback for the Kwik Jacks. Today, Im going to show you step-by-step How To Terminate the Cat5e/Cat6 Kwik Jacks. I'll include photos and a video to help you along the way. Let's get started.
Blog Updated 6-15-11: New Kwik Tool design

What You Need:


Electricans Scissors


Now that we have the right tools, lets punch down some keystone jacks

First, strip back the jacket about 1-2". The Cat6 cable (bottom) is larger than the Cat5e cable because it has a center spline, which separates all 4 pairs of wires. This center spline helps reduce Alien Cross-talk.


Cut off the ripcord


Cut off the separator if you're using Cat6 cable


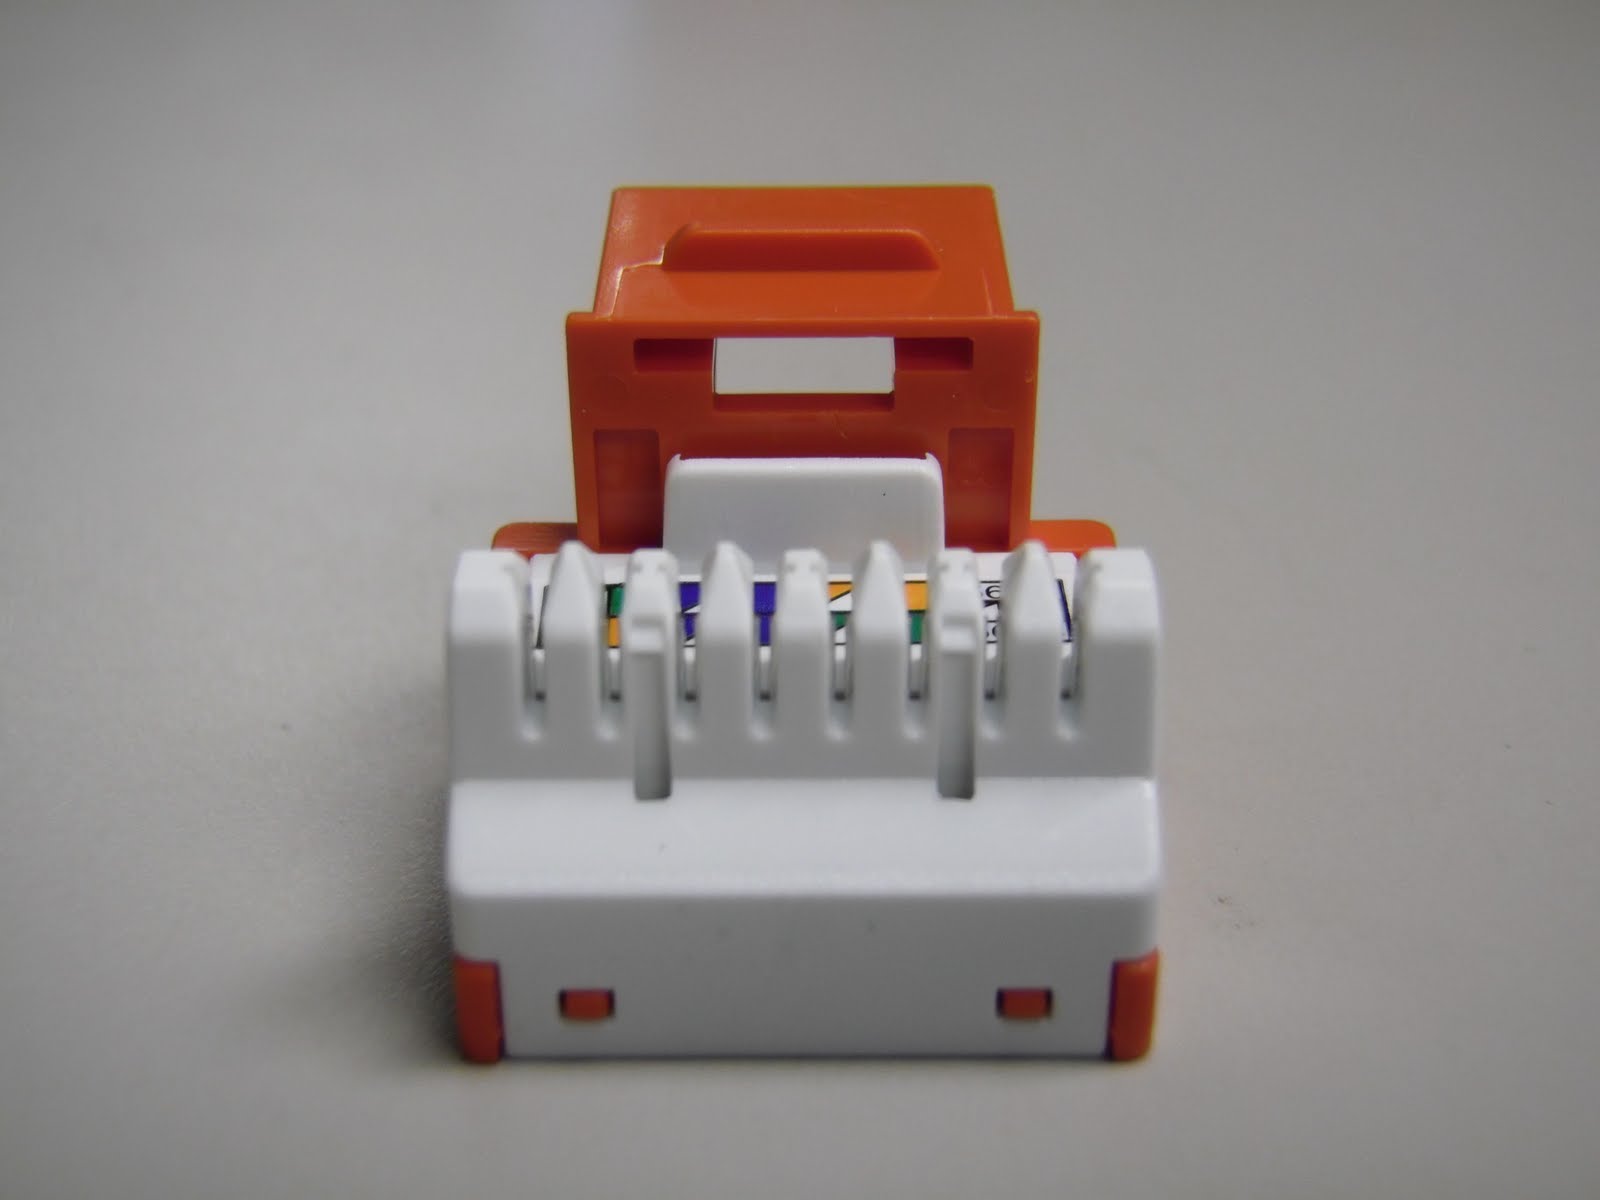
Now were ready to lace up the wires on your keystone jack. One the the nicest features of these jacks is the pointed 110s. This makes it much easier to lay the wires in, compared to the flat style some other keystone jacks have. Here's a close up view. You can also see it clearly shows the 568B and 568A color code on every jack.


Follow the color code on the side of the jacks. We suggest using 568B since it is the most common. Here is a picture of the 568B color code.


You can use your fingernail to seat the wires, or a utility knife. Make sure not to use the sharp side though, or you could cut through the wire jacket. Once all 4 pairs are laid down in the jack, it should look like this.


Make sure the jacket on your cable is as close to the keystone jack as possible. You don't want anymore than 1/2" of the wires exposed. Below is a picture of the WRONG WAY to do it.


Once the 4 pairs of wires are laced onto your Kwik Jack, slide the jack into the Kwik Tool
Updated 6-15-11: New Kwik Tool design
Here is what the Kwik Jack looks like inserted into the Kwik Tool

Once you have the Kwik Jack in the tool, simply squeeze down on the handle and release. This will punch down and cut all 4 pairs of wires. Remove the Kwik Jack from the tool. Here is a completed Cat5e/Cat6 Kwik Jack
Tip: You can also use a 110 punch tool to terminate the Kwik Jacks


Now, snap on the included dust cover and you're done.


Now let's watch Mercy demonstrate this process on video:


We hope our article on How To Terminate Cat5e/Cat6 Kwik Jacks Using the Kwik Tool was helpful. For more information, or to order any of these items, visit our website at Discount-Low-Voltage.com

Related Posts:

Wednesday, November 25, 2009

How To Punch Down Cat5e/Cat6 Keystone Jacks

How to punch down a Cat5e/Cat6 keystone jack, step-by-step instructions. I took a bunch of pictures along the way to better explain the process, and to let you see just what it should look like. If you want to see the process of punching down a Cat5e or Cat6 jack on video, scroll to the bottom of this post. To get started, let's take a look at what tools you will need:

Electricians Scissors (regular household scissors will work also)

Wire Stripper (you can use electricians scissors if you don't have any wire strippers)


Now that we have all the tools, let's punch down some keystone jacks.

First, strip off at least 1 inch of jacket on your Cat5e/Cat6 cable. Make sure not to cut into the wires. If you do, you'll need to start over. This picture shows what the two cables look like side by side. The Cat6 cable is larger (bottom) due to the separator between the pairs.

Cut off the ripcord

If you using Cat6 cable, it should have a separator. Cut that off as well. Simply pull the 4 pairs of wire back and cut it off

Now were ready to lace up the wires on the keystone jack. This style of jack is very user friendly and great for beginners or professional installers. You can see 110s are in a single row and that they are pointed, making it easier to lace the wires down

Let's go ahead and wire these keystone jacks following the 568b Wiring Diagram

You can see the keystone jack has the color code for 568A and 568B on the jack. They are very similar, but 568B is most commonly used nowadays.
 

Once all the wires are laid down, your keystone jack should look like this. Notice how I left the pairs of wire twisted. I was able to do this because of the pointed ridges on the jack, making it much easier to set the wires in. Many other styles of jacks out there have a flat surface, requiring you to untwist all 4 pairs of wire down to the jacket. Also notice how the jacket of the cable is right up against the keystone jack. You don't want any more than 1/2" of the wires exposed.

Once you have the wires laced in correctly, set your keystone jack in a jack palm tool. If you don't have one of these available, you can punch the jack down on the ground or a desk, but I suggest putting a piece of cardboard down to prevent the jack from slipping out when you punch them down. I would strongly suggest AGAINST using your hand to punch down jacks without the use of this tool. The jack can slip out and the tool will cut right through your hand. Not a pretty site

Now, take your punch tool and find the side that says "CUT". You want to make sure the tool faces the correct way, or you'll cut the wrong side of the wires off. This is how your tool should look when punching down the jack. Notice the pointy tip on the left side of the 110s

 A close up view of the 110 blade shows this better

Once the punch down tool is positioned correctly, push down firmly until you feel it pop. You should see the wire cut off. If it doesn't, you may need to do it once more. Here you can see I terminated the brown pair

Repeat with the other 3 pairs of wires and you have a completed keystone jack. It will look like this. Note how the jacket is very close to the jack. You want to make sure you keep it as close as possible.

Here is a picture or the WRONG way. The cable jacket is stripped too far back, exposing more than 1/2" of the wires


Lastly, press the clear dust cover on your jack and your DONE


Now let's watch it on video


New Tool Available!

Want to terminate Cat5e/Cat6 jacks quicker? Try the Kwik Tool and Kwik Jacks, available at Discount-Low-Voltage.com. Read the instructions for Terminating Cat5e/Cat6 Kwik Jacks here. The Kwik Tool removed the need for buying the punch down tool, 110 blade and palm tool. Safer, faster and less expensive. Call us for details on how to get a free Kwik Tool today! (888) 797-3697

We hope you enjoyed this article on how to punch down Cat5e/Cat6 keystone jacks. Feel free to leave comments or suggestions in the comment box below and thanks for visiting.

Related Posts:

Still have questions? You can reach us at (888) 797-3697
Visit our website at Discount-Low-Voltage.com to order any of the items seen in this article.